posts may contain Amazon affiliate links, which earn me a small commission when you buy (but doesn't cost you anything extra). Occasionally I receive free products and/or run sponsored posts—this will always be stated clearly in the post. Thank you for supporting this blog.

This website contains some quotations, excerpts, and screen clips from copyrighted material. These uses fall well within the copyright doctrine of "Fair Use".
Friday, December 31, 2010

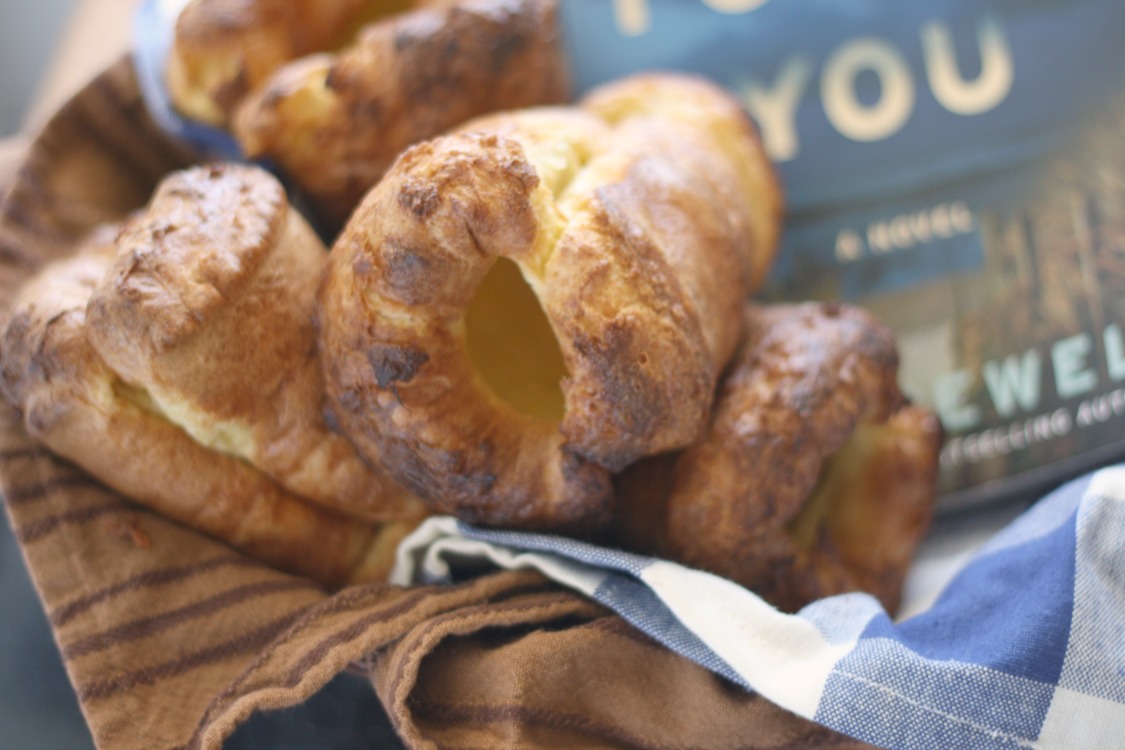
Baking Taralli Pugliesi ...and a happy New Year!

I have a penchant for doing things backwards.  A quality I prefer to believe is endearing.  For example, when I dreamed of the glory that becoming a Bread Baking Buddy would bring me...and subsequently found out that I still had time to jump in on a December challenge...and to top it all off, realized that the challenge consisted of Italian bread...I dove in head first.  Have I ever mentioned that I was born to be Italian?  Of course I have.  Tuscany, take me away....  So, I made bedroom eyes with the photo and recipe...broke out my mammoth mixing bowl and my semi- trusty scale...and got down to business.  At risk of losing some of the romance, I'll tell you that they looked like little bagel bites.  Totally not as enchanting as taralli pugliesi sounds say it with me now...taraaaalli puglieeeeesi, but true never the less.  They do end up tasting vaguely reminiscent of a bagel, but more like a cracker scented with fennel.  Which brings back to the beginning (where I should have started...backwards, remember?)...after they were cooling and being monched on (everybody liked them, by the way), I decided to do a quick search to find out what Taralli Pugliesi were exactly.  Oh.  They're an Italian snack cracker.  No wonder.  Reminiscent of a breadstick or a pretzel or a bagel. I also read that sometimes they're made sweet and drizzled with a sugary glaze.  And often they're dunked in wine.  Ah, Italy...I love you so....

TARALLI PUGLIESI
adapted from Food Bible Le Ricette Regionali Italiane by Anna Maria Gostii Della Salda 
via Lucullian Delights
makes ~90

1 kg (1000 g / 2.2 lb)  AP flour
200 g extra-virgin olive oil
2 Tbs. (+ more) tepid water
11 g fennel seeds,bruised a bit (optional)
7 g instant yeast
1 tsp salt
2 eggs (or the equivalent of dry white wine)

Dissolve the yeast in 2 Tbs. of tepid water. Mix the yeast water with the lightly whisked eggs and the olive oil.

Mix flour, fennel seeds and salt and then add the liquid. Start working the dough and continue to add small amounts of tepid water until you have a firm but pliable dough (used 1¼ c. total).

Start rolling 2 - 2½" long ropes that are as thick as your little finger and pinch the ends together to make an oval. Put the taralli on a parchment paper, cover with a towel and leave them to rest ~20 minutes.

Turn on the oven to 392° F (converted from 200° C...so just get it there-abouts, I suppose).

While the taralli rest, bring a fairly large pot of water to a boil.

Lower 15 taralli at a time (this really depends on the size of your pot...mine was big...don't over crowd or it will lower the heat) into the simmering water and as they surface, take them out and put them to dry on a kitchen towel or rack.

Transfer to baking sheets covered with parchment paper or a silpat.
 Bake until golden and cooked through, ~20 minutes.

Eating Italian crackers in a spattering of cool sprinkles...how perfectly melancholy.
We have some surprising weather here in Northwestern Indiana on New Year's Eve...rainy and 48° 55° F!  I love it!  It feels cleansing instead of frozen... 
WISHING YOU AND YOURS A SAFE AND HAPPY NEW YEAR... MAY YOU BE BLESSED.

*This post is linked to:
*Bread Baking Buddies (in conjunction w/ Bread Baking Babes)
BYOB

Thursday, December 30, 2010

Cookbook Review: More Make it Fast, Cook it Slow by Stephanie O'Dea

I love to cook.  I love spending time in the kitchen.  I love surrending all of my senses to food.  Okay...nothing new, right?  But sometimes...sometimes....I need a break.  We all do.  Don't get me wrong, Mexi is pretty rockin' in the kitchen, too...but there's times when neither of us feels like it.  So, in lieu of starving or expensive take-out, I dust off a slow-cooker.  Or two.  I'll be honest with you, though.  I don't normally pour over slow-cooker cookbooks the way I do "regular" cookbooks.  I mean, I own two.  And those are stuck in a sea of hundreds of others.  Literally.  That all changed when I added number three to the tide.  More Make it Fast, Cook it Slow by Stephanie O'Dea is different.  I actually found myself bookmarking pages.  Lots and lots of pages!  This book has over 200 recipes- all of which are gluten-free, by the way (if you follow her notes).  Something I love about this book is that it is divided into three sections: $7 and Under, $10 and Under, & $15 and Under.  Seriously.  Meals that feed anywhere from four to twelve people...require very minimal effort...and taste delicious.  I'm totally crushin' on this book and my slow-cooker right now.  I don't think I'm cheating on my love for cooking by breaking out my slow-cooker every now and again...especially not now that I have so many things I want to use it for!  I've tried four different things to date...all of which we really enjoyed...and have many more meals to share with you in the future, but I couldn't wait any longer to share what I've found so far with you.

I'm going to start with my absolute favorite thing I've made from the book so far.  I love it so much that I want to marry it.  But that would make me a bigamist, and I'm not down with that.  Peperoncini Beef Sandwiches were in the $10 and Under section...and they may be the easiest thing on the face of the earth to make.  I'm not going to share all of the recipes in the book with you...but I am going to share this one.  It serves ~6...Place 2 pounds of beef chuck roast in a 4 qt slow cooker.  Pour 1 (16 oz) jar of peperoncini peppers over it.  Cover and cook on low for 8-10 hours.  Uh yeah.  That's it!  When you remove the lid from the slow-cooker...the smell that assaults your senses makes you want to bury your face in the resulting beef and shake your head back and forth. Would it not ruin the beautiful work your slow-cooker did over the course of the day.  Or your skin.  Seriously, stick in a fork and move it around and the meat just shreds apart.  Chuck has long been one of my favorite cuts of beef...it shreds so nicely.  I piled it on a toasted bun and it was love at first bite.  O'Dea suggests serving it with sliced mozzarella or swiss...I think provolone would rock it, too...but it doesn't need it.  And that's big words coming from a cheeseslut like me.
In a second slow-cooker...that's right, I had some simultaneous slow-cooker action going on that day...I had some Creamy Ranch Mashed Red Potatoes going.  These were in the $7 and Under section and served ~6, as well.  As expected, they were awesome.  We love potatoes.  We love ranch.  We love not having to do anything except hitting them with an immersion blender just before serving.  And by we, I mean me.  O'Dea also throws in a great recipe for Homemade Ranch Dip Mix at the end of the recipe.  Awesome. No MSG!
Also in the $7 and Under section and serving 6 was this Lemon Pudding Cake.  I was a bit apprehensive about how it would turn out, but I was pleasantly surprised by the results.  It set up nicely after letting it sit for a while.  The top was more custardy than cakey...and the bottom was very pudding-like.  The lemon flavor shown through beautifully, as well.  It's not going to win any beauty pageants any time soon, but it definitely gets my vote for Miss Congeniality.  I'm not sure I'd make it very often, but I'm glad I tried it.
The last thing I made...which scented the whole house magically for hours and made our bellies scream in anticipation...was "Real" Pork and Beans.  Not anything like you imagine when you think pork and beans...but absolutely tasty!  I thought it was basically like a southwest-style chili.  It fell in the $15 and Under section...mainly because it uses pork tenderloin as the meat...but that's still a pretty inexpensive meal for 6 in my book.  I actually made it into a meal for at least 8 by cooking up some elbow macaroni on the side and tossing it together for a chili mac that I developed a must-satisfy craving for while it was cooking.  Totally.  Awesome.
I have everything ready to make O'Dea's version of Hoppin' John this New Year's...black-eyed peas, smoked sausage, collard greens...oh yeah.  I'll be updating you on how it was after we've tried it. (*Update: 1/1/11...click on the name Hoppin' John above to see my results. Mmmmm.) Also on my to-try list from More Make it Fast, Cook it Slow...go figure...two different version of my obsession  TORTILLA SOUP. So, take it easy on yourself every once in a while...break out the slow-cooker.  And check out a copy of this book for some fantastic ideas! 

*I received a copy of this book free for review from the publisher, but the thoughts expressed in this post are all my own.


Sunday, December 26, 2010

English Muffin Bread

English Muffins make me think of my mom.  Growing up, I remember her forking one open and toasting it up for breakfast.  And I was like, "eeeeeyyyeeewwww."  Kids.  Sheesh.  I mean, what was my reasoning?  My thought process?  Not really sure, but I eventually saw the light.  I'm thinking it may have had something to do with a little discovery that goes by the name of Eggs Benedict.  Heard of it, by chance?  Heavens opened.  Light shone brightly.  The rest as the say, was history.  And all of the other clichés that fit.  I mean, come on.  That oddly delicious sourness mellowed by butter-filled craters.  Yes please, I'll have another.  So, after trying this awesome recipe for English Muffin bread...and yes, it does taste pretty durn close...I know that advance-planning will come into play a day before I go to visit mommy dearest the next time.  We will slice into the loaf, toast it, butter it, reminisce about days of old.  Okay.  We're probably not gonna do all of that, but...we're gonna enjoy some tasty bread. Fo. Sho.
English Muffin Bread
adapted from a recipe inspired by King Arthur Flour via Artisan Bread Bakers
makes 1 loaf

3 c. all-purpose flour 
 1 Tbs. sugar 
1½ tsp. salt 
¼ tsp. baking soda 
1 Tbs. instant yeast 
1 c. milk 
¼ c. water 
2 Tbs. butter, melted

cornmeal, to sprinkle in pan
Whisk together the flour, sugar, salt, baking soda, and yeast in a large mixing bowl. 

 Combine the milk, water, and butter and heat to between 120°-130°F. The liquid should be hotter than lukewarm, but not so hot that it would scald you.  Pour the hot liquid over the dry ingredients in the mixing bowl. Mix thoroughly w/ a wooden spoon.  Dough will be very soft.

 Lightly grease a smallish loaf pan and sprinkle the bottom and sides with cornmeal. 

Scrape the dough into the pan, leveling it in the pan as much as possible. 

 Cover the pan w/ a linen towel or plastic wrap which has been sprayed on the inside w/ cooking spray; let the dough rise till it's just barely crowned over the rim of the pan, ~45-60 mins. When the dough is almost finished rising, preheat the oven to 400° F. 

Remove plastic and bake for 20-22 minutes, or until golden brown (interior temperature should be 190°F)

 Remove the bread from the oven, let sit in pan for 5 minutes before turning loaf out of the pan and setting on a rack to finish cooling.  Let the bread cool completely before slicing.
You didn't think I'd send you into swooning episodes by making hollandaise in the same post as the bread, did you?  I am feeling the need for some, though.  Sooo...keep those eyes peeled!


*This post is linked to:
BYOB
*Yeastspotting!
~December BOM for Artisan Bread Bakers


Friday, December 24, 2010

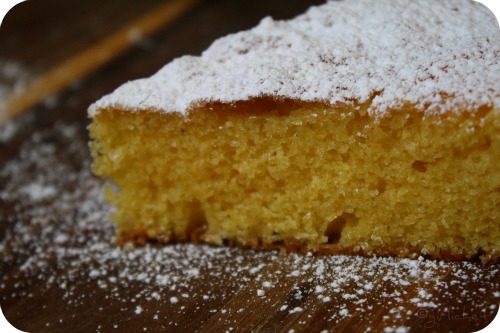
Almond Cornmeal Cake

Wishing you all a Very Jerry Christmas!!
Just a quickie to wish everybody a very safe, happy, and peaceful holiday...eat well!!
Almond Cornmeal Cake
adapted from Giada De Laurentiis
serves ~8

½ c. yellow cornmeal
½ c. cake flour
1 tsp. baking powder
big pinch fine sea salt
4 oz. unsalted butter, softened
 ¼ c. (2¾ oz.) almond paste, cut up
1¼ c. confectioners' sugar, plus more for dusting
1 tsp. almond emulsion (or extract)
2 eggs
4 egg yolks
¼ c. sour cream
Preheat oven to 350° F.
Butter and flour an 8" spring-form pan.
In a medium bowl, whisk together the cornmeal, cake flour, baking powder, and salt; set aside.
Using a stand mixer with a paddle attachment, beat the butter and almond paste on high speed until smooth, ~5 minutes. Reduce speed to low and slowly add confectioners' sugar. 
Mix until thoroughly combined and light and fluffy. Raise speed to high and add the almond emulsion, whole eggs and egg yolks, one at a time. Mix until well combined. Reduce speed to medium and add the sour cream and dry ingredients and mix until just incorporated.
Pour the batter into the prepared cake pan and smooth the surface with a spatula. Bake in the lower third of the oven for 35 minutes, or until the cake is golden and pulls away from the sides of the pan. Transfer pan to a wire rack and let cool. Remove from pan and dust with confectioners' sugar.
I'll be by to visit soon...once all the craziness has passed. Almost!
Merry, Merry!

Wednesday, December 22, 2010

The Holidays are Making me NUTS Pie ...inspired by Waitress for Food 'n Flix

Spaghetti Pie.  Marshmallow Mermaid Pie.  Falling in Love Chocolate Mousse Pie.  Peachy Keen Tarts.  Spanish Dancer Pie with Potato Crust.  Naughty Pumpkin Pie.  Lonely Chicago Pie.  I Don't Want Earl's Baby Pie...aka Bad Baby Pie.   Jenna pours her emotions into her pies.  She grew up making pies with her mother and now she bakes for her controlling, jealous, nasty husband...and for the patrons at Joe's Pie Shack...and most recently for her gynecologist who re-awakens a passion for herself that she had all but forgotten was even there.  Waitress is part of our Food 'n Flix Double Feature this month...and a flick that never fails to make me crave pie.  Yes, it's a chick flick and a story about love...but perhaps not in the usual manner.  It's more about learning to love yourself...and how a child can open your eyes and change your outlook on life.

Inspired by the spirit of the film, I decided to make a pie to fit in with my own emotions this time of the year...

Mixed Nut Pie (aka The Holidays are Making me NUTS Pie)
adapted from Nigella Christmas
yield: ~12 slices

1½ c. ap flour
½ tsp. salt
½ c. butter, melted
¼ c. whole milk
½ c. golden syrup
8 Tbs. soft butter
1 c. packed light brown sugar
1 tsp vanilla
12 oz. mixed, salted, roasted nuts (no peanuts)
3 eggs
Preheat oven to 350° F.  

Mix flour salt, melted butter and milk in a large bowl to form a slightly wet dough.  Turn it out into a 9" tart pan w/ removable bottom.  Press it into the bottom and sides of the pan and place in freezer until filling is ready.

Melt the golden syrup, butter and brown sugar over a lowish heat in saucepan.  Add vanilla, stir and remove from heat.  Let stand 10 minutes.
 Remove crust from freezer and pour in nuts evenly.  Set shell on a lined baking sheet to catch drips and over flows int he oven.  Whisk eggs into the slightly cooled mixture then pour the whole thing over the nuts. Bake for ~40 minutes or until filling is set and crust is golden.
This definitely soothed the holiday crazies for a short while.  Perfect with coffee...warm or cold.  The pie, not the coffee.  Coffee must be warm on a cold winters day.
We are currently featuring both Waitress and The Ramen girl at Food 'n Flix this month...

Food‘nFlix

Monday, December 20, 2010

Warm Up with a Nip of Winter-Spiced Vodka


Just a quick nip to help warm our bones as we sit around the fire tonight.  Preparing for the eclipse.  Welcoming Yule.  Enjoying the longest night of the year.  It's the Winter Solstice!  

I hope everybody is making it through this week as joyfully as possible and that you enjoy these coming days with those you love.

Although I posted this amber, glowing, golden-hued vodka infused with the warmth of chile, cinnamon and other spices a couple of days ago over at Cocktail Puppy, I really wanted to share it with you here tonight.  It's super warming and will give your cheeks a rosy glow, for sure. Throw back a shot, mix it into a Bloody Mary for an extra kick, or make a festive Martini.  It's also a fun idea for holiday gifts because stored in a cool, dark place, it will keep well for at least a year!


Winter-Spiced Vodka
recipe from Nigella Christmas
makes 2 c.

1 tsp. whole coriander seeds
3 cardamom pods, bruised
½ tsp. whole cumin seed
1 cinnamon stick
1 whole dried chile
2 c. vodka

Begin by sterilizing your bottle(s) and let them cool.  Then simply slide all of your spices into the prepared bottle and pour the vodka in...either using a funnel or your fantastic free-flow skills like I did.  Because of course my funnel is lost.  Seal it.  Set it aside to steep in a cool, dark place.


For those of you looking for the Hearth and Soul Hop...it's on hold this week!  With so many people caught in the midst of holiday madness, we've decided to give the hop a week of rest.  Please come back next week and join us then!


Sunday, December 19, 2010

Hot Cross Buns ...they're not just for Easter anymore.

...or were they ever just for Easter?  Actually no.  They are most often associated with Easter, but a more accurate time to associate them with could be Good Friday.  In Christian lore, since the cross represents the crucifixion, people eat them on Good Friday and Easter.  But if you dig back even further, you'll find the Saxons eating buns marked with a cross that represented the four quarters of the moon in honor of the goddess Eostre (hmmm...Easter...Eostre...the perfect example of that golden thread that weaves its way through all the traditions, beliefs, and religions of the world.  Eostre is often referred to as the goddess of the rising dawn or uprising light.  So.  Easter.  Rising.  But, I digress...)*. Whatever its roots, the hot cross bun is popular in one version or another throughout the world today.  Whether it contains the traditional raisins or currants...or chocolate chips...or dried, candied fruits...you can pretty much bet that it will be pleasantly sweet, yeast-leavened, and flecked with warming spice.  And if you're lucky, you can find them throughout the year.

Hot Cross Buns
makes 8 buns

2 c. (250 g) white bread flour, plus extra for dusting
2 c. (250 g) ap white flour
½ c. warm water
½ c. warm milk
1½ tsp. (5g) instant yeast
2 tsp. (10g) fine sea salt
3½ Tbs. (50g) superfine sugar
1 medium egg
3½  Tbs. (50g) butter
2/3 c. (100g) mix of yellow raisins, cranberries, chopped dates
finely grated zest of an orange
 heaping ¼ tsp. each cinnamon, nutmeg, & allspice

for the crosses (optional)
6 Tbs. (50g) ap white flour
7 Tbs. water

to finish
1 Tbs. apricot jam, sieved
1 Tbs. water

In large bowl of a stand mixer fitted with a dough hook, combine flours, water, milk, yeast, salt, and sugar.  Add egg and butter and mix to a sticky dough.  Add orange zest, dried fruit, and spices and knead on low until silky and smooth.  Cover and let rise in a warm place until doubled in size, ~1 hr.
Deflate risen dough and divide into eight equal pieces.  Shape into rounds and dust with flour.  Place on a floured board (I covered mine in parchment for easy sliding), cover with plastic and let proof about 30 minutes, until roughly doubled in size. Mine didn't really rise too much this time.
 Preheat oven to 400° F.  If you're making crosses, toss the flour and water into a baggie and massage them until they form a paste.  Snip a tiny bit from the corner of the baggie and pipe crosses across the top of the buns.  Since I just wanted to see how this recipe worked out, I piped crosses on half of the buns and left the other half plain.  Transfer risen buns to baking sheet and bake for 15-20 minutes.  I simply slid the parchment from my cutting board straight onto my baking stone in the oven.
While the buns are baking, melt the jam with the water in a pan.  Brush the resulting glaze over the buns as soon as you remove them from the oven.  Transfer to a wire rack to cool.  I was a bit disappointed by the buns with crosses piped on them.  You can see them...but just faintly.  Perhaps less water or more flour next time??  Although, it may just be that I'm used to seeing hot cross buns with a cross of piped icing after baking...or ones that were slashed before baking.  Yeah, the more I think about it, the more I like the subtlety of the cross.  It's a good option.  Okay.  Thanks for letting me talk that out.
Serve the buns warm, cooled, or toasted.  
Honestly, they're pretty fabulous any way you slice 'em...but I love them warm.  Mine seemed a bit dense, so perhaps next time I'll bake them longer...I think the density resulted from being a bit undercooked. But the flecks of orange and spice that dot the sweet bread are so seductive.  Normally hot cross buns are made with either raisins or currants...but the mixture of raisins, cranberries, and dates is out of this world!  And that glaze. Oh my. It serves for more than just sheen.  It's a bit of sticky goodness left on your fingers to remind you of how good they were once they've disappeared!
*source: Wikipedia
*This post is linked to:
Bread Baking Day #35 (Bread w/ Dry Fruits) is being hosted at Taste of Pearl City this month.
Bread Baking Day #35 - Bread with dry fruits (last day of submission January 1st 2011) BYOB
*Yeastspotting!