Let me go back a few months. We're talking to the end of last Spring or so. Back to the day that my coffee maker broke. One day it just wouldn't lift the water up and through its hose to shower over those dark grounds any more. So, morning after morning for a good six months, I've been filling a pot of water and putting it on the stove to steep. I then scoop the grounds into the basket of the machine and little by little, ladle that steaming water over the grounds...waiting for each tiny basketful to make its way into the carafe. Aw. Doesn't sound so bad, does it? WRONG! It was a pain in my ass. Especially the few times in the beginning where I instinctively poured the water into the machine instead of putting it on the stove. Ugh.
Lift out the waiting basket and tip the whole machine over into the sink. Refill a pot and guide it to the stove top this time. Or when I was so impatient to get that first sip in me that I try to will the water to drip faster and overfill the filter only to have a bunch of grounds bobbing around in my mug when I pour it. And I still didn't get it any faster. How about when you want to go back for your second cup, but you have to throw it in the microwave to heat it up because, after all, your machine isn't working remember? Sure, that brown liquid is sitting there all pretty in its carafe, but no comforting steam floats up to greet you when you pour it. Because it's now gotten cold. Not the same. Not to mention the many times in the beginning when you walk up (or your husband does) to the machine and cautiously put your hand on the side of the glass to test the temperature. Duh!
What's my point? Well, I finally bought a new coffee maker yesterday. Please don't ask me what took so long. Other things kept coming first, is all. Apparently getting the kids to school in proper uniform is more important that energizing myself in the mornings. But the simply giddiness I felt when filling the tower with water, measuring out heaping scoops of grounds, and programming the timer on the machine last night was unmatchable. Until, that is, I woke up this morning to the scent of coffee. Coffee brewed automatically fifteen minutes before I even stirred from my slumber. Coffee that I could pour before I even had to fathom opening my eyes more than halfway. Yes, my friends. It's the little things.
Speaking of little things...
These bite-size pastries would go great with a good cup of coffee. And since little things are so much fun, you might also want to check out the recipes for these Mini Chamomile Cakes with Honey Frosting, these Grapefruit Vanilla Bean Mini Bundt Cakes, or these Mini Cranberry Mince Pies. And for something miniature to put in your coffee (if you're into that kind of thing), why not try some Homemade Mini Peppermint Marshmallows!?
yield: 24 bite-sized snacks

Bite-Size Cherry & Strawberry "Pop Tarts"
prep time: 20 MINScook time: 8 MINStotal time: 28 mins
A mini version of the favorite childhood toaster pastry!
INGREDIENTS:
For the filling:
- 1 cup fresh cherries, pitted and diced (or strawberries, diced)
- 3 tablespoons granulated sugar
- 2 tablespoon cornstarch
- 2 tablespoon water
- 1/2 teaspoon almond extract (or vanilla extract if using strawberries)
For the crust:
- 1 double pie crust, homemade or store-bought (the rolled dough kind)
For the glaze:
- 1 cup powdered sugar
- 1-2 tablespoons milk
- 1/2 teaspoon vanilla
- food coloring, optional
- sprinkles or jimmies, optional
INSTRUCTIONS:
- Pulse fruit in blender or mini-processor until slightly chunky. Stir cornstarch into water. Add slurry (water + cornstarch mixture) and fruit along with sugar and almond extract (or vanilla) to a small pan. Heat on stove over medium heat until mixture has thickened, stirring almost constantly. This just takes a few minutes. Remove from heat and allow mixture to cool. (Alternately, you could puree the mixture afterwards.)
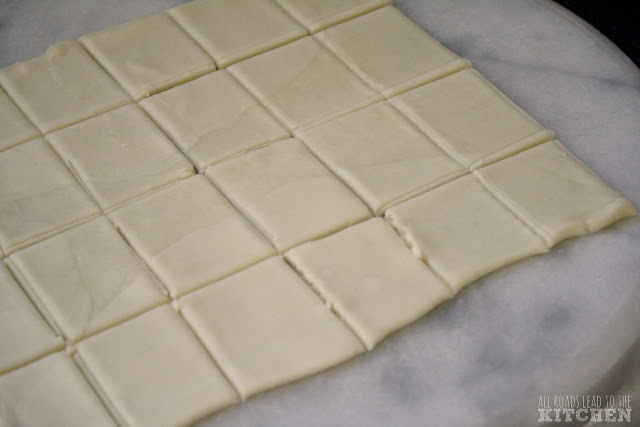
- Roll each pie crust into a rectangle that is 8" x 9" wide. Cut each rectangle into 24 smaller rectangles that measure 2" x 1 1/2″. (Alternately, unroll storebought pie crusts, fold over the edges to form a rectangle, then roll out to correct size. Cut as directed.)
- Spoon a small amount (1/2 to 1 teaspoon) of cooled filling onto the center of the pie square, taking care not to get it near the edges (harder than it sounds). Gently lay a second rectangle over the top of the filling. Press the edges of the rectangles together with a fork. Transfer to a baking sheet.
- Bake minis in an oven preheated to 400° F for 8-10 minutes, or just until the edges begin to brown.
- In a small bowl, combine powdered sugar, milk, and vanilla to make glaze. Tint with food coloring, if desired. Spoon over cooled poptart pops, sprinkle with colored sugar, and allow to the glaze to harden slightly before serving. Enjoy!
©All Roads Lead to the Kitchen. Slightly adapted from Babble.
Created using The Recipes Generator


